
A month or so ago I posted about my kitchen desperately needing a personal touch. I perused Pinterest and racked my brain for some ideas. Something I knew I wanted was a chalkboard. I see them all over, and I love all the cute quotes everyone puts on them. So my first project in ‘Operation Decorate the Kitchen’ was to make a chalkboard. You might not know this about me (or my family, I guess), but my Dad is SUPER handy. He has been in construction for years, and can build ANYTHING! So, growing up I helped with lots of projects around the house. I feel pretty comfortable with hand tools and power tools. And I have (maybe a false) sense of ability when it comes to building things. So, the thought of making a framed chalkboard didn’t make me even bat an eye. 
I had a mental picture of what I wanted, and headed to the building supply store.
For this project I needed:
- a board for the chalk board- mine was big, 24 inches x 48 inches- you can make any size
- chalkboard paint- I started with spray paint, but switched to a quart size can instead
- trim for the frame- I used small moulding, two 8 foot pieces
- at least 4 clamps
- paint for the frame- I chose a blue color, and bought the sample size, it was plenty
- 2 paint brushes- the one I used with the chalkboard paint is now only for that paint…
- a miter saw
- wood glue
- hand stapler with staples (The industrial kind, not a paper stapler. You can find them at Walmart in the hardware aisles.)
- left over stain, or some brown paint- this is optional, I used the stain just to darken the frame after I painted it blue
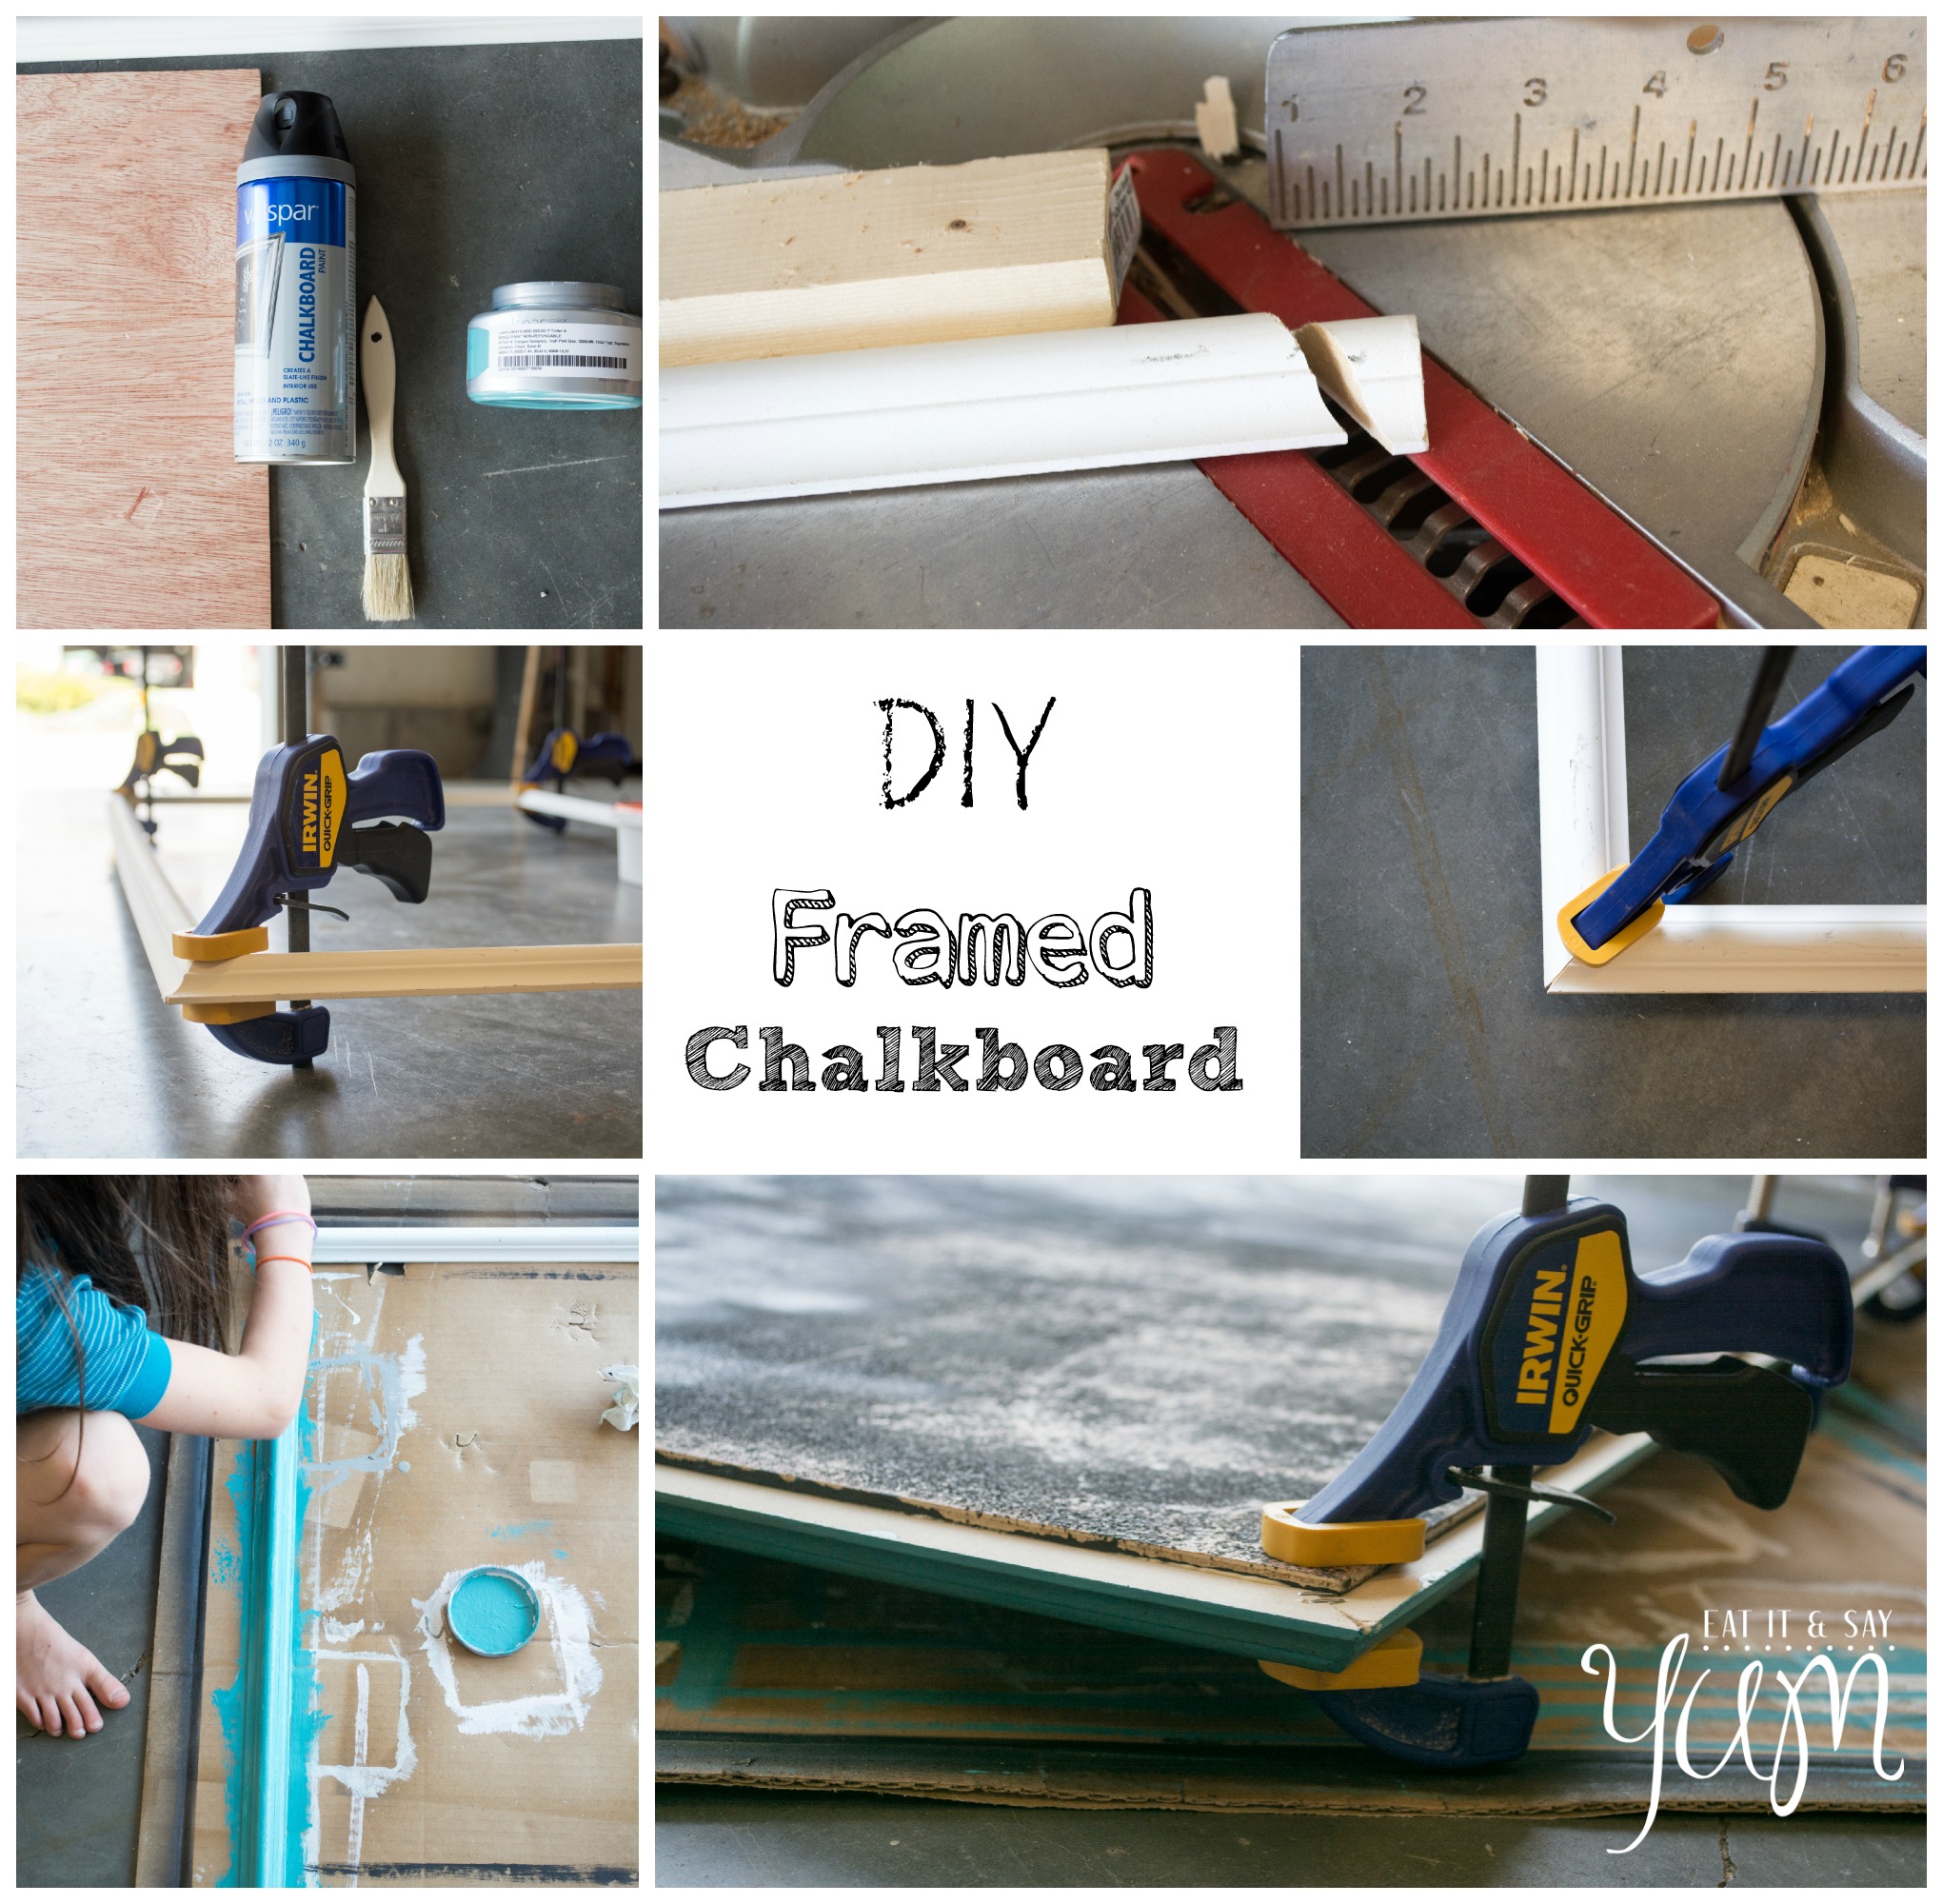
Step 1: Paint your ‘chalkboard’ with the chalkboard paint and let dry. Refer to the paint can if you have questions about how to use the paint.
Step 2: While the paint is drying cut your trim pieces. I measured the side pieces 25 inches long, that’s 1 inch longer than the sides of my chalkboard. And the top and bottom pieces should be 49 inches long. When you cut the trim, those measurements should be for the outside edges, where the trim is longest. (See how on the inside of the frame, those edges are shorter?) Then cut the trim at a 45 degree angle. Set your miter saw to that angle to make it easier. It should be the setting all the way to the sides, and should be labeled with a 45. (For a basic, yet ‘entertaining’ video that kind of shows how to do this, click here.) Make sure you cut both ends the right way. The long side should be the long side at both ends of the trim when you finish cutting… And make sure you cut two of the same size, to make all four sides. 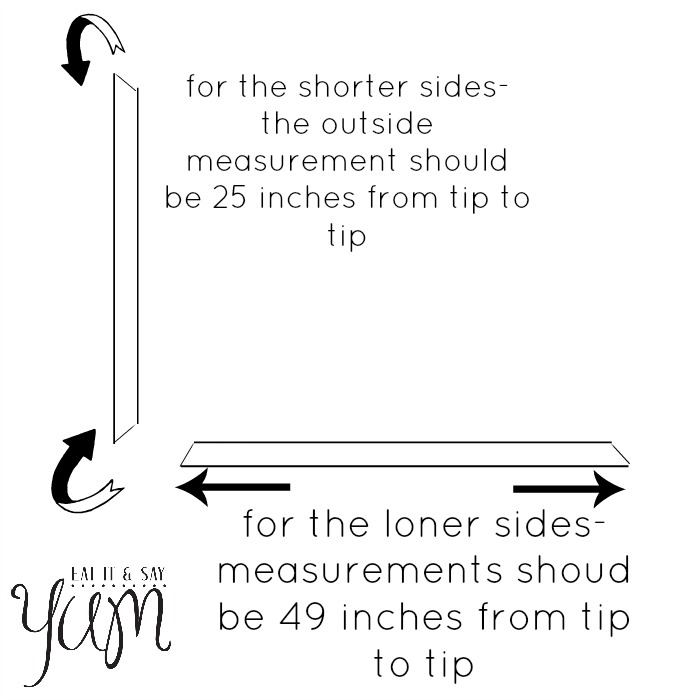
Tip- you can make your chalkboard a different size, just add about an inch (like I did) to the board measurement to get how long your trim should be for the frame. 24 x 48 inch board= 25×49 inch frame.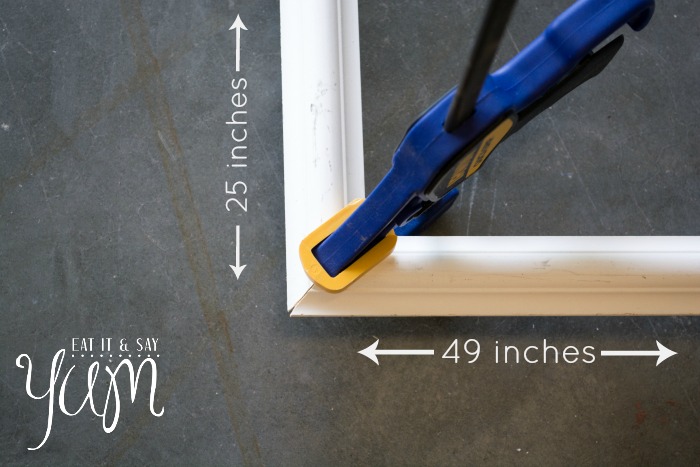
Step 3: Once the trim is cut, fit the corners together with some wood glue in the seam. Build it with the frame face down, so you can also staple the seams together on the back. Then hold each corner together with clamps. Let the glue dry over night.
Step 4: Once the glue is dry go ahead and paint your frame. I (my daughter) did a coat of blue paint and let it dry, then brushed on a light layer of stain and wiped it off with an old rag, that doesn’t leave lint behind. (An old shirt works well.) The longer the stain sets the darker it will appear. I wiped it off almost immediately. Let dry for an hour or more. Until the stain is dry.
Step 5: Using wood glue and staples attach the painted chalkboard to the back of the frame. Apply the glue to the back of the frame, only where the chalkboard will cover it. Center the chalkboard on the frame and secure with staples. Allow the glue to dry again before displaying the finished product. I used heavy duty picture hangars to mount my chalkboard on my wall.
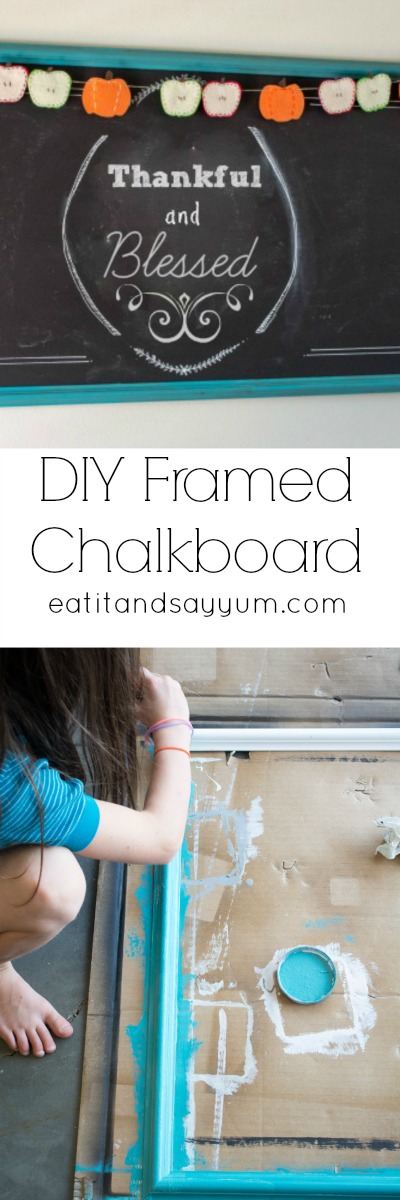
I was super happy with how the project turned out. Everyone who comes over comments on it. Now I just need to work on my chalk writing skills… Click here for more about the bunting over the chalkboard.
Any questions? I’m happy to help if I can!
I’d love to see your finished project if you make one. Post a picture of it on Instagram and tag me!
See where I like to link up.


Such a cute chalkboard! Love the blue and that you let your little ones help!
~ Ashley
Wow, Leia! You are really handy! This was a great post. You should put it on instructables.com as well. It is a beautiful project.
Thanks, Ryan!! I will check out that website. 🙂
Another thing we have in common! My writing skills pale in comparison to yours though. I will be forever trying to perfect that one! I love that you made this yourself. You rock!
Ha, I feel my writing skills need lots of fine tuning… But, thanks!! I amazed at how much we have in common. Too funny. 🙂 We were meant to be friends!